Read More http://herlemonadestand.blogspot.com/p/cooking-club.html
Showing posts with label Crafts. Show all posts

Monday, March 8, 2010

New Frames!!!!

It's been weeks, no, actually months, since Mr. Adrian finished my picture frames. Well, after Christmas, a new baby, life....I finally finished them today!!!! I've had the pictures all ready for them since November! I'm a very prompt and timely person, can't you tell!

The decorative part is a decorative molding made of poplar that I found at Lowe's. The outer part of the frame is pre-primed pine that we got from Tupelo Lumber. They are made to fit a 11x14 sized picture.
I don't know how Mr. Adrian made these, he showed me all the neat tools and gadgets he used, but really, it went in one ear and out the other. I was just so amazed at how great of a job he did!
 I began by staining the poplar with a gel stain.{Minwax: Walnut} I used two coats.

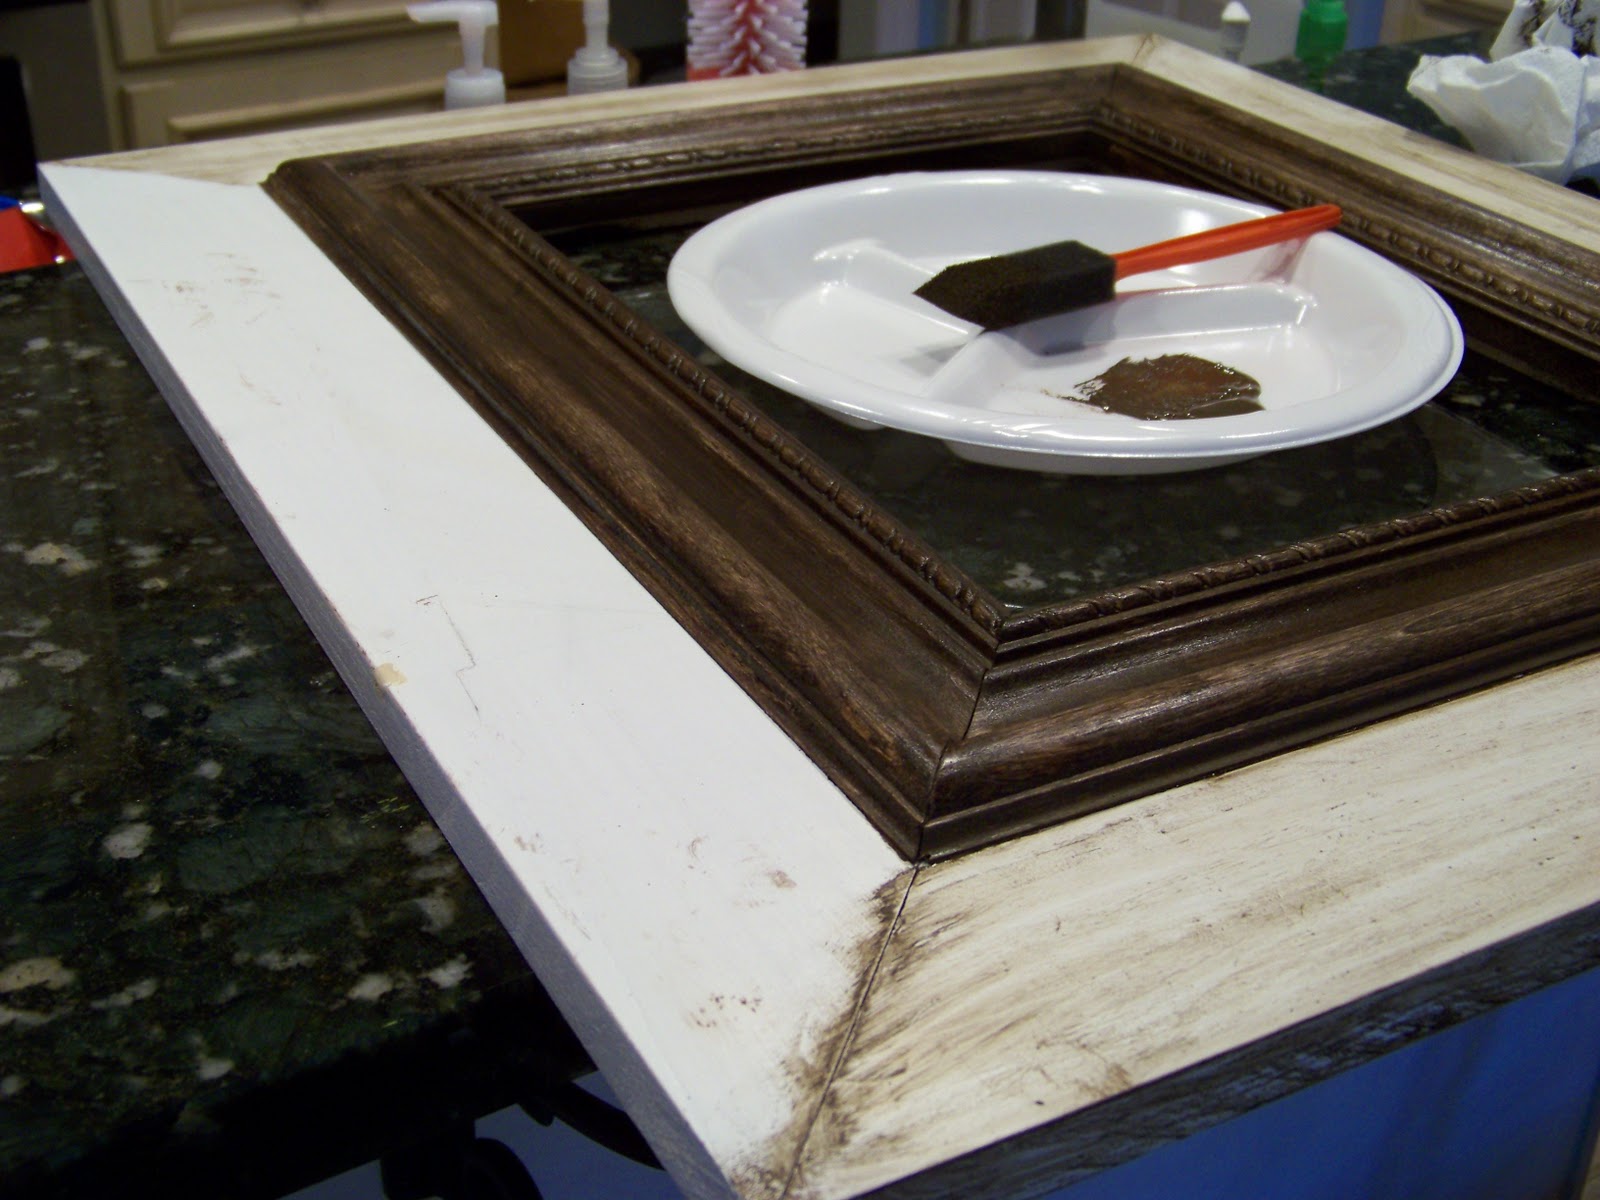
 Then, months later, I used some dark brown craft paint and painted the white, pre-primed outer part.
Using a foam brush I quickly painted it on in the direction of the grain. And then, with a paper towel, I quickly wiped it off, using long strokes to make it look like old wood.
 I roughed up the edges with some sandpaper and this is how they turned out....
 Looks good, doesn't it!!!
 These are the pictures Amanda, over at Reflections by Amanda Smith, took of the boys back in October. Where's the third...well, when I get Carrie Ann's newborn pic printed, it'll go up there too...probably by Christmas!


I linked up over at Cheri's party over at:

and with the girls over at:


Wednesday, February 10, 2010

Playroom Makeover

This disaster is was our playroom.
This is the playroom when it was in somewhat of an orderly state...
With some convincing, Jim let me sell the couch, and it's matching loveseat, woohoo!
This wasn't a room on our original home plans. It was the space for the dining room, and just a column where the corner is. We had the area walled up and added french doors so we could use it as a study or playroom. With a tight budget, I am well on my way to making it a fun playroom for our kiddos as well as a warm, cozy place for Jim and I to come be alone and watch t.v.
We  {Jim was out running and I was supposed to be doing something I'm sure a lot less straining...I did do this 2 days before Carrie Ann arrived!} I started by cleaning out the room.
The floors in this room are great, but we are carpet people and I want it to be warm and soft for the kids.
For $48 I bought a carpet remnant from a local carpet company that was just a foot larger than the actual size I needed. I also purchased carpet padding to help soften up the feel and to help protect the hardwood.
Andrew didn't think it was a good day for a nap and thought he'd help his pregnant mama instead.
Using a tape measure, scissors and Jim's {haha} new rotary tool set, I cut the carpet remnant to fit. I shewed Andrew off to the living room to play with his un-assembled train table.
Back when I made my trip to IKEA the day after Christmas, we got this really cool shelf on the super inexpensive side. Now, had I been aware of Ana over at Knock Off Wood: How to Build Knock-Out Knock Off Furniture, I would have built and customized it myself...but I didn't so I got this shelf for $69!!!
The shelf to the right is also an IKEA piece, that we bought before moving to this house.
And, Wahla!!!  And yes...it stays this perfect all the time. Gotta go pick out a cool lamp for the far left, to finish out the look. The big black bins are all sorted with different toys and I intentionally put the heavy stuff in them so the boys wouldn't pull them out!
This room is..To Be Continued...because I got interrupted by labor...but that is okay. As soon as I am fit and able, I will go lamp shopping at none other than my mecca...Hobby Lobby...  At the opposite end of the room, beside the window will sit a big comfy chair and ottoman. I will visit my favorite fabric store..PHI Fabric Wholesales here in Tupelo and get some fabric from their clearance reems to make curtains for the window and for the french doors. {just in case we ever have a house full and need to use it for sleeping!} On the right wall, I intend to use magnetic and chalkboard paint and make a big chalkboard/fridge door for the boys...they love the chalkboards in their rooms.
It's still a work in progress, but Jim and the boys have been very pleased with how it has turned out so far!!
To be continued....

Friday, January 22, 2010

Trash to Treasure in my Bathroom!

     When we were picking the colors for the rooms in our new house back in May 2008, we made a purpose to not be afraid of color. We were fearless! Every wall is a different color and we just recently added our fifth shade of blue to an accent wall in the boys' new room. I got one room of my very own to girlify...our master bath. Pink was totally out...Jim's rule, so I picked red. It's a pretty dark, lipstick red. Too bad the painters used flat paint {don't get me started on that}. I wanted a spa-like master bath...Candles all around, warm and sweet aromas, relaxing...feminine. Here's what I ended up with!

It's not that bad actually...
The picture is the Millennial Sunrise over the Sea of Galilee. It was a wedding gift from our pastor...his brother took the picture on one of his many trips to the Holy Land and Brother David had made this particular print into a poster. It's one of Jim's favorite pics. Above the jacuzzi tub, directly opposite our french doors that overlook our back yard and small lake, it's kind of perfect.
The curtains were a great find on the Walmart $1 stack of fabrics. I bought 9 yards of this shear material and attached it to a spring rod I already had. Nine bucks was worth the sad attempt to spa-ify my master bath!
But look what it has turned into! This is where the boys prefer to take their bath...it's a big tub, that's why I like it too. Jim's smelly running clothes have found their home in here as they await their turn in the washing machine. My pretty red flower, you know, the one that got stolen off my back porch {here}, used to sit on the back left corner. It has been replaced with dolphins, sharks, boats and dinosaurs.
It's sad, I know.

Can you imagine the thoughts and ideas that literally raced through my brown-eyed head when I spotted this marketing print in a local department store!!!

I stalked that store for a month waiting for their graphics to be changed and this master piece to be tossed to the side!!!
Well, yesterday was trash day for them and treasure day for me!!!
I absolutely love the Sea of Galilee picture, but no one ever sees the pretty thing in our bathroom except for us. I have better plans for it.
This picture is perfect for this room.

Doesn't it add a certain spa-like ambiance!!!
Here it is at a different angle, just in case you just don't get it yet...

I called Jim in, so excited to show him.
He looked....sigh....turned to the Sea of Galilee picture I had placed in our bedroom and said, I like that one better. I mean, that's just a canvas on the wall. I don't like it. {Shhh...he doesn't know that it's really a reallly thick plastic, might sound worse to him}
What do you think of my trash to treasure find?

Thursday, January 21, 2010

Girlified!

     I'm all about re-using whatever baby boy items I have accumulated over the last 3 and a half years. So ever since learning that our third little sports star was going to be a girl, I've been hard at work re-inventing! Not sure where or when I got this little hat, but it's quite tiny and since both my boys were born in the dead of summer, there hasn't been much of a need for it.

I know, I was thinking the same thing...It's perfect for Carrie Ann...being that she will be born between today and February 10th!
It was missing something though, when she is tiny enough to wear this hat, she will still look like a scrunched up alien and hard to differentiate from a male scrunched up alien, so I found this piece of pink satin ribbon in my craft closet tonight and got a little crafty!!!
I weaved the ribbon in and out of the crocheted cuff of the hat. I taped the end of the ribbon to help guide it through, making sure to keep the ribbon from twisting along the way.

I tied off the end of the ribbon in a square knot and cut the ravelled ends at an angle.
When I actually do pack that hospital bag, this darling little hat will definitely make it's way in!

Tuesday, January 19, 2010

See Carrie Ann's Nursery!

     After hours, days and weeks of thinking and planning, Carrie Ann's nursery has become a reality, minus the baby of course! With borrowed help, borrowed ideas and a borrowed sewing machine-Melissa and I were blown away with what came of what was once a toddler boy's sports themed room. {Melissa is my partner in Crafty-Crime, she is a junior at Ole Miss and I bribed her with food, smoothies and make-up to get her to help me!} 
     I know you may think that a nursery isn't that big of a deal, don't feel bad if you do-Jim doesn't understand my excitement either. But, it is to me. This is the first nursery I've gotten to do since we started making babies 3 1/2 years ago, and according to Jim-our LAST! :(
My idea for color and theme came from two sources, this Cocola Couture Delilah bedding:

And this love seat/chaise lounge that a great friend offered to me, for free!!!

Okay, okay...on with it....So what was once this....Taylor's room....

is now, this......

I know, WOW!!!
Okay, let's back up...Here's her pretty door hanger {I borrowed this idea from someone else's nursery, if it's your's thanks!!!}

The yellow dot disc will have her birthdate and size on it. When I was making this, Jim was sitting in the living room...kind of perplexed, wondering how I was going to make that Pac-Man looking thing into a carriage!

When you walk in, to the left is the jack and jill bath that she will share with her brothers. It is our fifth shade of blue and a beach theme...I'll share its' details when I girlify it a little bit. This pretty red mirror was a rush gift from the Troubadors at the W...It used to be blue and white, then I painted it black and finally, when we had our first house, I painted it red and added these white beads left over from Christmas...it has been sitting in the craft closet awaiting adoption until now!

The little red and white hat box was a $3 find at Hobby Lobby that will hold her baby keepsakes that will probably never make it to a baby book. Look how optimistic I am! Her name was made with my new Cricut machine that Mrs. Debbie gave me for Christmas. {See tutorial here} That red striped thing in the far right corner on the floor is a memory/bow holder I made and haven't found a space for just yet. The changing table/little dresser was white and I took pictures of it's transformation as I spray painted it brown, but my camera ate those files and so all you get are the knobs.
I bought this drawer set along with the white wicker rocker that sits on our back porch for Taylor back in 2006 for $75 from a friend. I knew I'd grow to love it someday!

To the right you see the chaise, with 2 blankets, one that was the original baby bedding comforter that I bought for Taylor at the New 2 You consignment sale here in Tupelo when it was over at the National Guard Armory back in 2006..I paid $20 for that bedding back then and you wouldn't recognize it today. The other blanket, the brown and red one, I made. It's one of two that I made for CA and the only two I will ever make...they were hard! The little end table was made by my real dad when I was an itty bitty baby, or so I am told. the lamp on the bottom was an Ikea find--it has cherry blossoms on it.

These frames were all Ikea finds as well! Jim picked out the big center frame...didn't he do a good job...I was proud of him!!! Melissa put the brown/polka dot material inside the center frame...When I find some red or white ballet slippers, I'm going to hang them in the middle of that frame. The two side mirrors were just black square mirrors I found at Ikea for $2 and Melissa stamped them with a gold damask design that matches the design on the back wall curtain.
On this same wall is the window...oh the window treatments.....

I got all this material, plus the bedding material from PHi Fabric Warehouse on South Gloster. I love that  place!!! The red is a silky type material with red velvet polka dots on it. It had to go floor to ceiling to match the main back wall. The cream sheer is of the same fabric, but with tone on tone vertical stripes. I tied them up with brown ribbon and they puddle at the bottom. The black fabric you see hanging by an extention rod is dark material that makes the room darker when the curtains are drawn in the evening or during naptime to make for a more peaceful sleeping baby!!!  The curtains and shear are attached to the top of the wall using a .99 wooden stick from Hobby Lobby and a staple gun...may Jim never see how many holes I have put into this wall!!!

I haven't found the perfect spot for the tutu that Jennifer made for CA, so for now, it adorns the closet door, right beside the bow holder that Melissa and I made. {See tutorial here}

Now, for the main attraction!!!

The crib is on it's third turn with all the teething marks to prove it! The Delilah bedding I spoke of earlier was wayyyy too expensive and was just way too busy for the chaise lounge, so I took to making my own bedding but using their original idea. Cocola Couture suggested blue walls...well what do you know---This wall was already blue compliments of Taylor's previous decor!  I had to girlify it so we hung this light brown, sheer material that we found at Hobby Lobby on clearance for $2 a yard...you can't beat that people! It has a darker brown damask design printed on it. I added a cream border to it to frame out the wall and existing applique using some frabric I already had hanging out in my craft closet.

For whatever reason, when Jim and I put this applique on the wall almost 2 years ago, we didn't center it....I was 8 months pregnant then so there is absolutely no telling what I was thinking. Melissa cut the cherry blossom to the right out of some off white paper using the Cricut and we attached to the wall using spray adhesive.

By making a duvet for the existing off-white bumper and re-covering the old quilt with the same material from the windows, I saved myself Jim, a lot of money!!!

See those dark red ties...there are like 36 of those babies on that bumper. I made them from the same material on the windows and I guilted Jim into turning about half of them right side out for me after I sewed them!

I even made a new bedskirt.....Isn't is sooo cute!!! Guess you gotta see it in person to really appreciate it!

Check out that mobile!!! This was the original mobile. Jim's mom gave to us for Taylor.

I took it apart, and spray painted the skeleton...note to self: open garage door when spray painting in garage in sub-freezing temperatures!

Using coordinating ribbons, and some shatterproof Christmas ornaments, Melissa and I came up with a one-of-a-kind crib mobile!!!

So there you go!!! It's feminine and chic...not at all what I expected it to be when we started planning, but now I LOVE it!!!
That's what I've been soo busy doing these last few weeks. Still gotta add some accessories here and there, but otherwise I am so excited that Carrie Ann's nursery will be one she can grow into for years to come.