


Read More http://herlemonadestand.blogspot.com/p/cooking-club.html
Showing posts with label cooking. Show all posts

Saturday, May 15, 2010

Worst Dessert Ever!

     I don't let Jim in my kitchen very often, and when I do, it's only as my sidekick. When he married me 5 years ago it was okay to have a dessert every night. I hadn't yet birthed three kids and had a job that kept me on my feet 8 hours a day.
     Now, well you know the story, my sweet husband requires a dessert every night. If I don't have something made he will scrounge through the pantry and fridge to see if we have the ingredients for whatever he is in the mood for.
     I got smart a long time ago and started making him desserts that I didn't like just so it wouldn't be so hard to say no. But, there are only so many desserts that I am not going to like!!! Then I thought I was being clever when I just stopped making them, but that just opened the door for him to get into my kitchen and drive me batty. Yep, if I don't have a dessert, the crazy man gets in there and starts messing up my kitchen! It's not that he's not a good cook or anything, because he is,  it's just that I'm afraid he might use the wrong side of the knife and put it back in the wrong place. And he really doesn't know the difference between Self-Rising and All-Purpose and I'd rather not explain the two! Just kidding. I'm just a control freak.
     Then one night, I had the best-most-worst dessert ever at a friend's house. She put a scoop of cookie dough in the bottom of an oven-safe bowl, baked it, and then served the cookie, in the bowl with a scoop of ice cream and chocolate syrup on top!!!!!
     You guessed it! I came home, made it for Jim and HE LOVED IT.  Big surprise, I loved it too!
It's sooo awful, but so easy. And the best part is...it requires no messing up of my kitchen! I love it even more!
This has become my "go-to" dessert when I am not in the mood to make something or feel like thinking much that week. I make sure I always have the two key ingredients on hand: Ice Cream & Ready Bake cookies, like these:
{If you are like me and don't want to be tempted with this dessert, you can do what I do and buy a type of cookie dough that you don't like!}
The Tupelo Middle School Cheerleaders just came around selling those big tubs of cookie dough that you can keep in your fridge...Those are perfect for this dessert!
Next, you will want a bowl like this. These are our everyday bowls that we use for everything.
But make sure it says this on the bottom::::::
Oven Safe 
 Then you put a scoop, or 1-3 of those pre-cut cookies in the middle of the bowl. {I use 1, Jim uses 3!}
These cookie scoops in this pic are actually scoops of homemade cookie dough. I was making a batch and had enough left for 2 bowls of dessert.  
Bake on 350 or whatever your cookie package recommends, for about 14 minutes. Top with a scoop, or two of your favorite ice cream and chocolate or caramel syrup and nuts...oh and the list just goes on! And that's it!!! You serve it in the bowls you make it in! See why I don't mind if Jim makes this one himself!

I suggest letting it cool for a few minutes after taking it out of the oven just so you can hold your bowl and ooh and ahhhh and let out a few mmmmmmmmmm's as you try to practice some self control and not lick the entire thing clean!!!!
I was out of chocolate syrup when I took these pics. Thank goodness!!!
You can thank me later for this one!

Friday, May 7, 2010

Good ole Molasses Cookies

     It's Cooking Club time tonight!!! I love the first Friday of every month! As I mentioned before we are going through Cooking Light, The Complete Cookbook: A Fresh New Way to Cook. This month I have to bring a dessert. This cookbook is full of fun dessert recipes, but I'm going to go simple tonight. I am headed to the kitchen right now to start on Molasses Cookies.
     One of the purposes of our Club is to try new things, and to see what something looks and tastes like and what worked and didn't work for certain recipes. I re-make at least one or two things from each month's club. It's sooo much fun!!! This month's choice for cookies is to remind myself to go back to something basic and simple!
    Here we go and I am sooooo glad that I didn't eat these things before I got to Wendy's house... they are just that good! AND....they are actually low fat!!! Yah, check out the recipe to see how these delish cookies can actually be considered a healthy choice!
   First though, I want to show you what you do when your oven is on 375, your hands soaked in cooking oil and all three of your kids wake up from their naps:
Yah, I know...she looks real excited to be there doesn't she!!
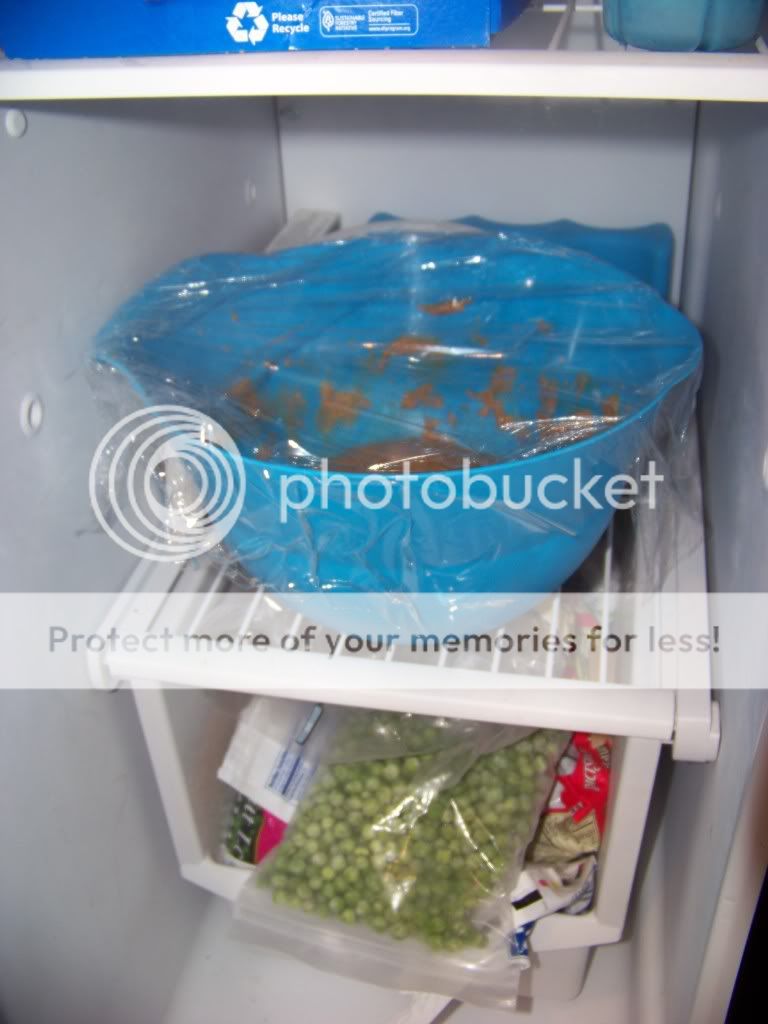
Anyway, back to the cookies... {I usually preheat my oven before I do anything, but wait...don't heat it up until you put the dough in the freezer. There will be plenty of time to heat it up then.}
You will need:
1/2 cup       applesauce
1 1/4 cups   sugar, divided
6 Tbs          butter, softened
1/4 cup       dark molasses
1 large        egg
1 cup          all-purpose flour
1 cup          whole wheat pastry flour
2 tsps          baking soda
1 tsp           ground cinnamon
1/2 tsp        salt
1/2 tsp        ground ginger
1/2 tsp        ground gloves
Cooking spray
From the picture that looks like a lot, but really these were super, super easy.
1. Spoon applesauce onto several layers of heavy-duty paper towels, let stand 5 minutes. {I used 3 regular absorbant paper towels on top and bottom} Scrape into a bowl using a rubber spatula.
2.  Combine the applesauce, 1 cup of the sugar and butter; beat with a mixer at medium speed until well blended {about 3 minutes}
Add molasses and egg; beat well.
3. Lightly spoon flours into dry measuring cups, level with a knife. Combine flours and baking soda, ground cinnamon, salt, ginger and cloves, stirring well with a whisk.  {I used whole wheat flour, instead of ww pastry flour. If you do so, you can sub with 1 cup whole wheat flour minus 2 Tbs whole wheat flour for the 1 cup wheat pastry flour.} Add flour mixture to sugar mixture, beating until blended.
 
Cover and freeze 30 minutes or until firm.
4. Preheat oven to 375.
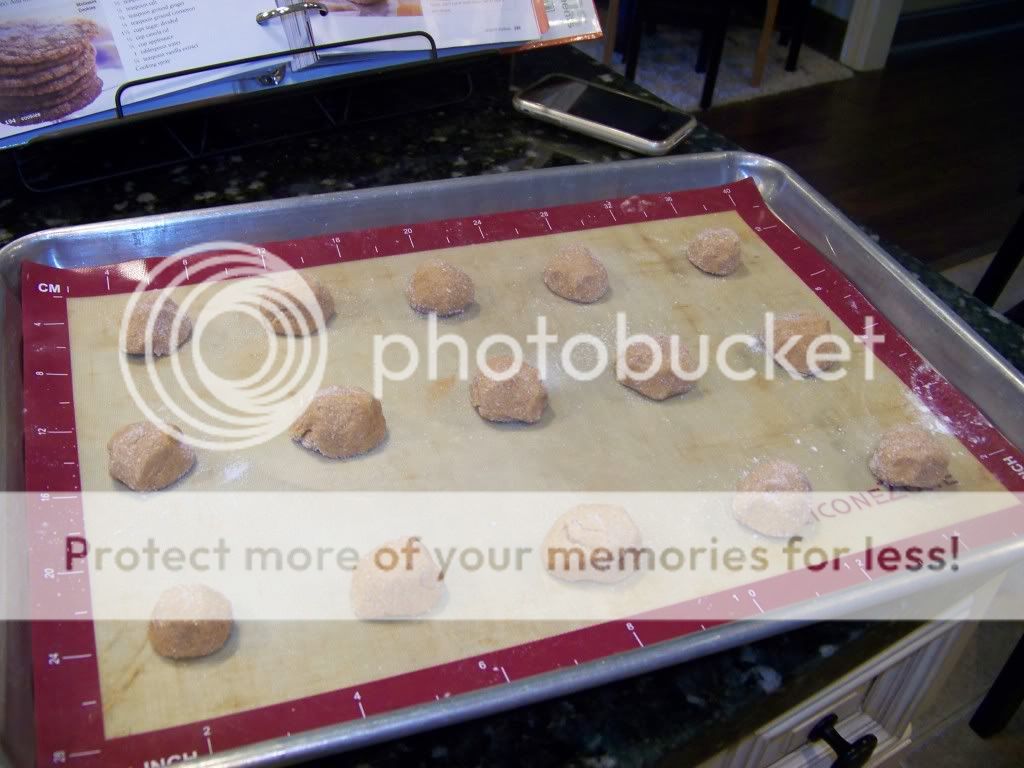
5.  With moist hands, shape dough into 32 (1 -inch) {My batch made 48} Roll balls into 1/4 cup of sugar.
Place 3 inches apart on baking sheets coated with cooking spray. {I heart my silpat pad!} That's a silicone baking pad that nothing sticks to!!! It realllly is the best thing since sliced bread!!! I use it for everything. If you don't have one, seriously, get off this computer and go get you one!!!
Bake at 375 for 8 to 10 minutes. {8 minutes makes them good and chewy!}
Cool on pans 5 minutes. Remove from pans; cool completely on wire racks.
Now all you need is a very cold cup of milk and a comfy chair!!!!!

Friday, February 26, 2010

I had to get back in the kitchen sometime

     My sweet friend Tammy had us over for dinner recently and made Chicken BBQ "Sammies" in her crockpot!!! OOOhhhhhhhhhhh, those things melted in my mouth. Jim even had seconds. It was sooo good. She got the recipe from Heather at Home with Heather and I of course had to have it too!
     I have never successfully made anything in my crockpot, but Tammy and Heather make it sound so easy and very helpful for busy mommies. I knew I was going to have to get back in the kitchen and start cooking at some point, so why not try these Sammies!
Here's what I used:
1 cup Ketchup
1/2 cup Maple Syrup
2 Tbs Mustard
2 tsp Lemon Juice
1/2 tsp Chilli Powder
1/4 tsp Garlic Powder 
4 Chicken Breasts (boneless, skinless)

I mixed all the ingredients in my greased crockpot pot.
I didn't have any garlic powder so I used minced garlic instead.
I cut as much fat from the chicken breasts as I could
Set my crockpot for 4 hours, I think I was supposed to do it for 5 though.
Added my chicken breasts.
In about 3 hours, my chicken was tender enough to shred with two forks.
And that's it! I think I had my crockpot up too high though, because to finish out the 5 hours, my liquid all got absorbed and seemed a little dry to me, but it was still sooo yummy. We ate this on whole wheat buns and it lasted us for 3 days! Tammy had all the fixin's though...she had the cole slaw, potato salad and pasta salad!!!
The next time I make it, I'll attempt to make some cole slaw!
Cooking in my crockpot was finally a success!  Maybe I'll try it again!

Friday, February 19, 2010

Nana's Apple Cake

     Our friend Mary sells Tastefully Simple products. It's like Taste of Gourmet and Company's Comin'. If you are unfamiliar with these, they are a semi-homemade person's best friend! They usually consist of all the non-perishable ingredients to a recipe-you add the perishable. One of Jim's favorite is Nana's Apple Cake offered by Tastefully Simple. {See Mary's site here}
Really, this is all you need!
The mix, 2 cups of chopped apples (any type) and 2 eggs.
There are lots of options listed on the side panel that make different versions, but I went for simple!
I used Golden Delicious Apples, it only took about one and a half apples to make 2 cups.
Mix all ingredients, pour into 8x8 dish and bake for 45 minutes on 350.

I scooped out a spoonful of delicousness, topped it with some cool whip and toasted pecans and drizzled melted caramel over the top!
Visit Mary at Tastefully Simple to see what else they have!
     

Saturday, January 2, 2010

The Cinnamon Crumb Cake I stalked


     Yah, you'd stalk this cake too if you saw it in a magazine twice in a month during your 8th month of pregnancy!!! Doesn't it just look scrumptious!!! I found it in the Good Housekeeping Winter 2009 Edition that was in the exam room at my OB/GYN's office. I decided to make it for breakfast for our Sunday School Class, but Andrew was sick that morning and I didn't get to indulge, but thank goodness there were about 3 slices left! And Jim was right, warm it up and slather on some butter and it just melts in your mouth, really! Here's proof you can recreate the pictures of recipes you find in those magazines!
Cinnamon Crumb Cake
Crumb Topping                                                                                 
1/2 cup(s) pecans, toasted and chopped 1/3 cup(s) packed dark brown sugar
1/4 cup(s) all-purpose flour
1/2 teaspoon(s) ground cinnamon
2 tablespoon(s) butter or margarine, softened
Cake
1 1/2 cup(s) all-purpose flour
1 teaspoon(s) baking powder
1/4 teaspoon(s) baking soda
1/4 teaspoon(s) salt
3/4 cup(s) granulated sugar
4 tablespoon(s) butter or margarine
1 teaspoon(s) vanilla extract
2 large eggs
2/3 cup(s) sour cream

Prepare Crumb Topping:
In small bowl, mix pecans, brown sugar, flour (I use self-rising) , and cinnamon until well blended. With fingertips, work in butter until mixture resembles marbles.
{Roasting nuts under the broiler for a few minutes brings out the sweet oils of the nut and makes them more flavorful! Watch them carefully, they only take a few minutes}


Prepare Cake:
Preheat oven to 350°F. Grease 9-inch springform pan {I don't have a springform pan, but it would have come in very handy for this recipe, I used a 9-inch baking pan instead}; dust with flour.

On sheet of waxed paper, mix flour, {I use self-rising flour, therefore I omit the baking powder, soda and salt} baking powder, baking soda, and salt until combined. {I did this in a bowl, have no idea why the suggest doing this on wax paper}
In large bowl, with mixer on medium speed, beat granulated sugar, butter, and vanilla 5 to 6 minutes or until mixture is fluffy, occasionally scraping bowl with rubber spatula. Reduce speed to low; add eggs, 1 at a time, beating well after each addition.
With mixer on low speed, add flour mixture alternately with sour cream, beginning and ending with flour mixture, scraping bowl occasionally, until batter is smooth.

Yah, I can't stand for 5 or 6 minutes anymore!

Pour batter into prepared pan. Sprinkle with crumb topping and gently press into batter.

Bake 40 to 45 minutes, until toothpick inserted in center of cake comes out clean. To serve warm: Cool cake in pan on wire rack 15 minutes. With small metal spatula, loosen cake from side of pan and remove, then cool an additional 30 minutes. To serve later: Cool cake completely in pan.


This was soooo good, I will definitely be making it again!!!

Monday, December 14, 2009

Oat'n'Toffee Grahams, mmm good!

    Once again, Jim came home, ranting and raving about a cookie thing a co-worker, Cherry Sims, had made and brought by for everyone to try. The next day, he came home with a hard copy of the recipe--You have all the stuff to make this, right? {It's like a kid coming home from school handing his mom instructions for a project due the very next day! You stare at it with jaw dropped, thinking, it's Christmas time, sure, I have all this and all the time in the world to do it!} She said it was so easy. So you guessed it, I made them tonight, but not after Jim saing first, "Hey honey, wanna make those cookies of Cherry's tonight? I'll help you!"  Music to my ears, he'll help me. That translates into, I'll stir and do what I'm told!
     Well, they really were easy and made my house smell oh, so sweet!
     The recipe yields 32 bars, I halved it, partly because Jim is the only one eating them, too much chocolate for me, and I don't like almonds, and partly because I didn't want to use an entire bag of chocolate morsals on something I wasn't sure Jim would finish. As always, I've included a play-by-play, except the part where Jim walked away and began doing something else...I reminded him he only had one minute til he had to take them out of the oven! P.S. If you have never gotten in the kitchen with your spouse, lovingly, and made things together, you should, it is so much FUN!!!!!!!!! When we were done, he said, you know, you are one cute pregnant girl...that was his way of telling me thank you....I wasn't lookin' too purty at that time!
Oat'n'Toffee Grahams
12     Whole Graham Crackers
1 1/2 cups rolled oats
3/4 cup granulated sugar
3/4 cup packed brown sugar
3 Tbs. all-purpose flour
2/3 cup butter, melted
1        egg, lightly beaten
1 tsp   vanilla
1        12-oz. pkg. semisweet chocolate pieces
1/2     cup smoke-flavored whole almonds,
          coarsely chopped {I couldn't find smoked, I just used roasted & salted}
      1. Preheat oven to 350. Line 15x10x1-inch baking pan with foil, extending foil beyond edges of pan.
      2. Arrange whole graham crackers in single layer in prepared pan.

     3. In large bowl, combine oats, sugars and flour. Add melted butter, egg, and vanilla; stir until well combined.
   

        4. Spoon over graham crackers and spread evenly to edges of pan to cover graham crackers.


      5.  Bake 20 to 25 minutes or until oat mixture bubbles and is lightly browned on top.


     6.  Remove from oven and sprinkle with chocolate pieces.

     7.  Return to oven 1 minute. Spread melted chocolate over top to cover.

     8.  Evenly sprinkle with almonds.

     9.  Cool in pan on wire rack.

     10. Use foil to lift from pan. Remove from foil. Cut or break into bars. Makes 32 bars.

     Can I say, YUMMO!!! We broke them into pieces instead of into 16 pieces. They are very rich, but our house smells sooooooo good now! I hope you enjoy!